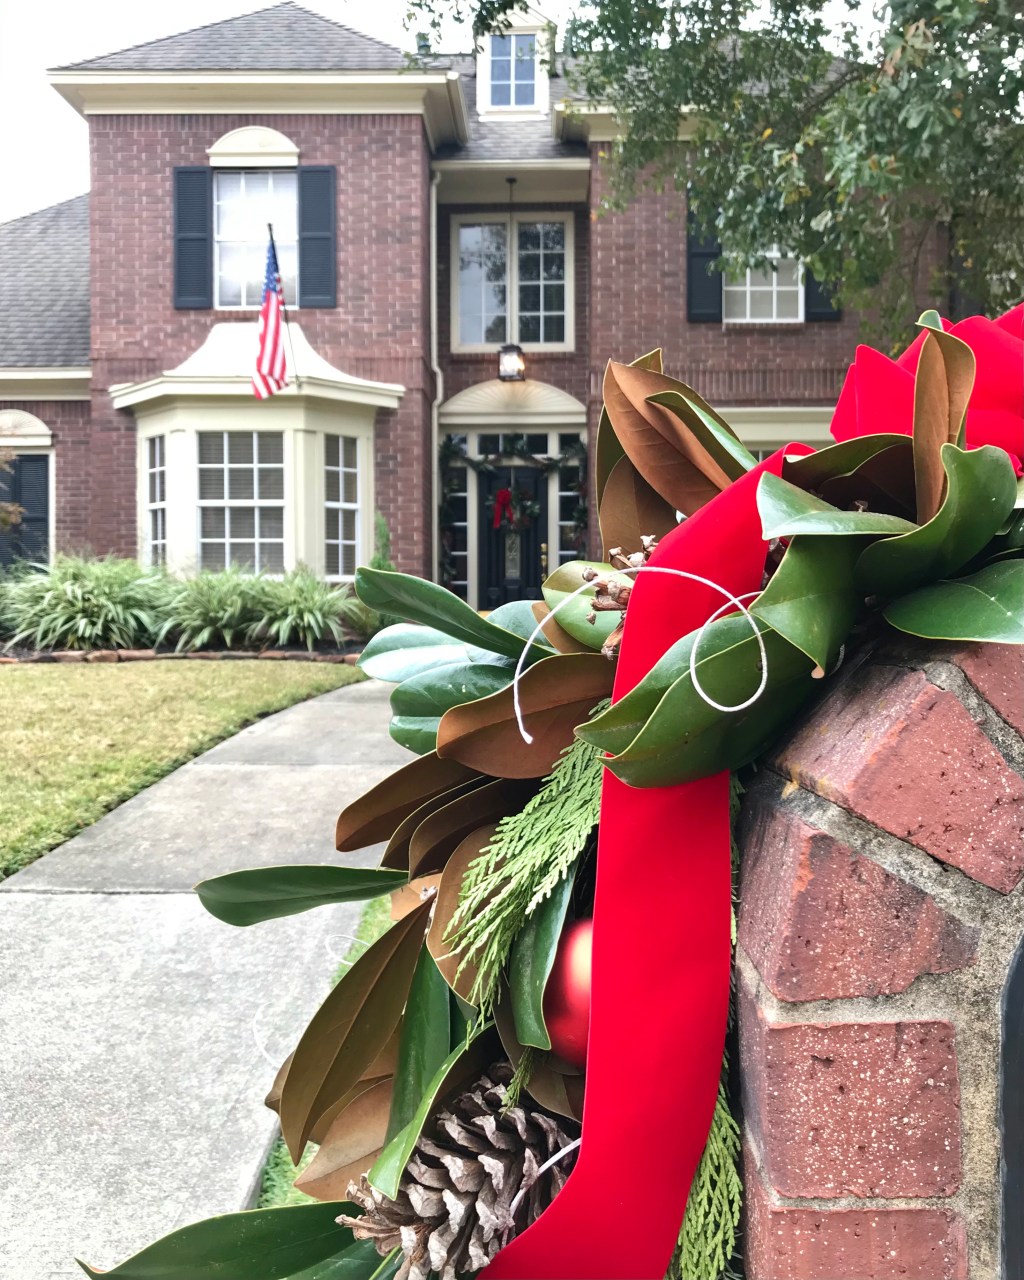

As I previously mentioned, I wanted to decorate my mailbox this year. I found some inspiration on Pinterest but I did not know if I would be able to get magnolia leaves. On Friday I went to Lowe’s and purchased some cedar garland and managed to get a few Christmas tree trimmings.

It was rainy and gloomy but if I was going to get this decorating done the week before Christmas, it was now or never.
How The Grinch Stole Christmas
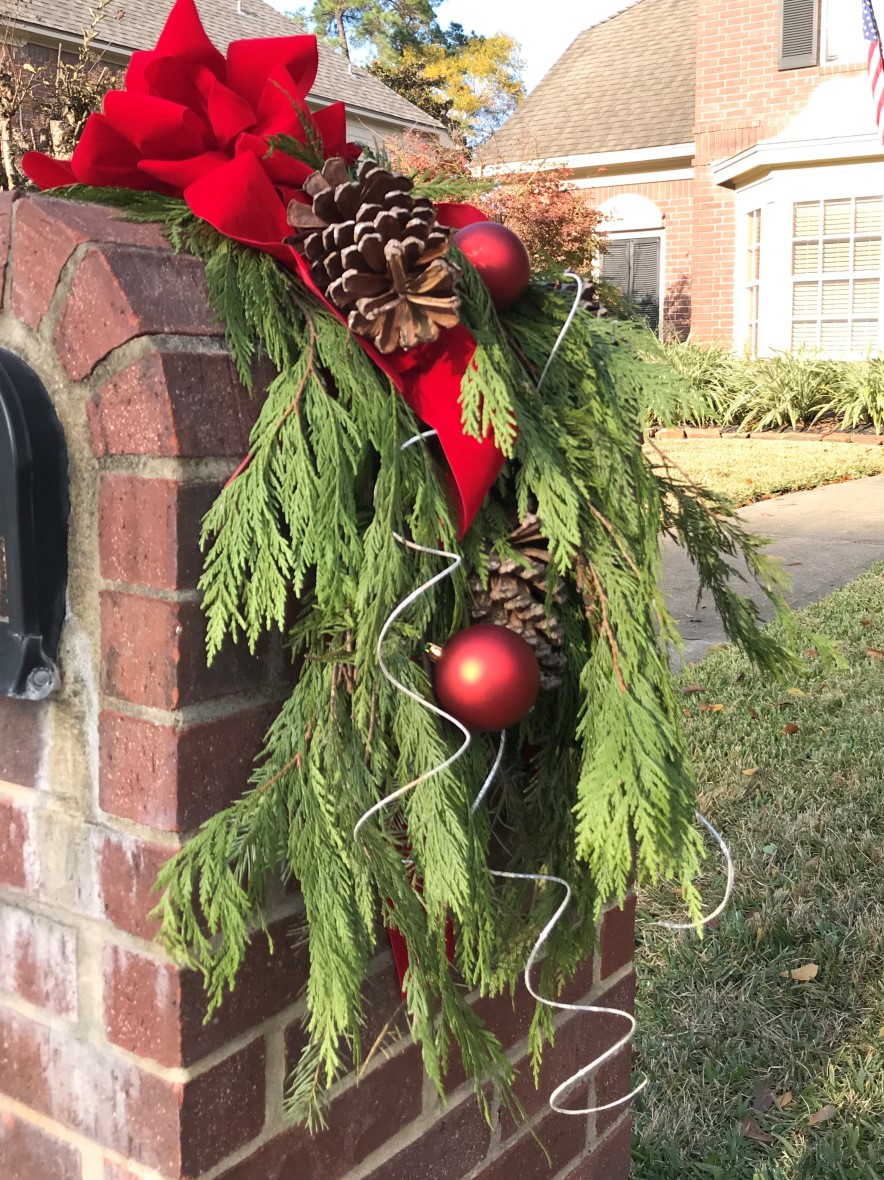
THE FIRST ATTEMPT
I spent a lot of the following Saturday working on the mailbox and what I ended up with was a monstrosity. The lime green color of the cedar, the silver picks, the red ornaments, and the big red bow shouted “How The Grinch Stole Christmas.” It looked like I had stolen the Grinch’s hair to decorate the mailbox.
But, thankfully, I ran into my neighbor who has a magnolia tree in their backyard and they cut some limbs for me. The next day I started over completely.
How-To Make A Magnolia Arrangement
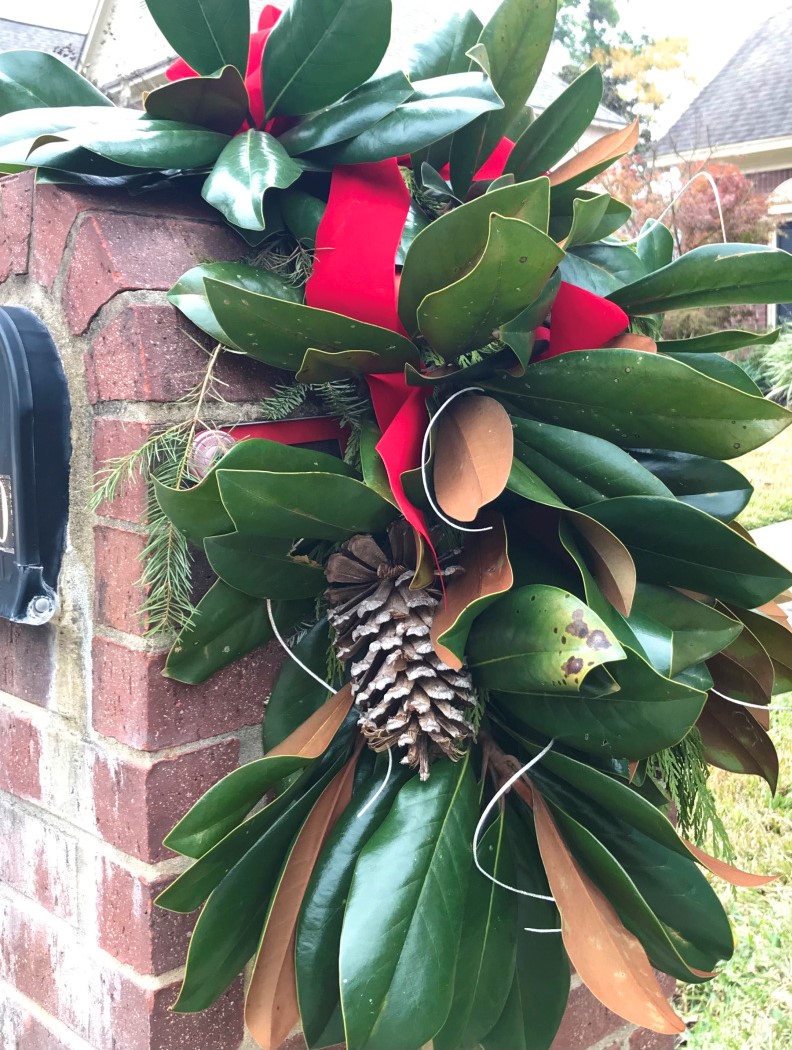
THE SECOND ATTEMPT
It was raining all day and my mailbox needs pressure washing so ignore it and the dreary lighting .

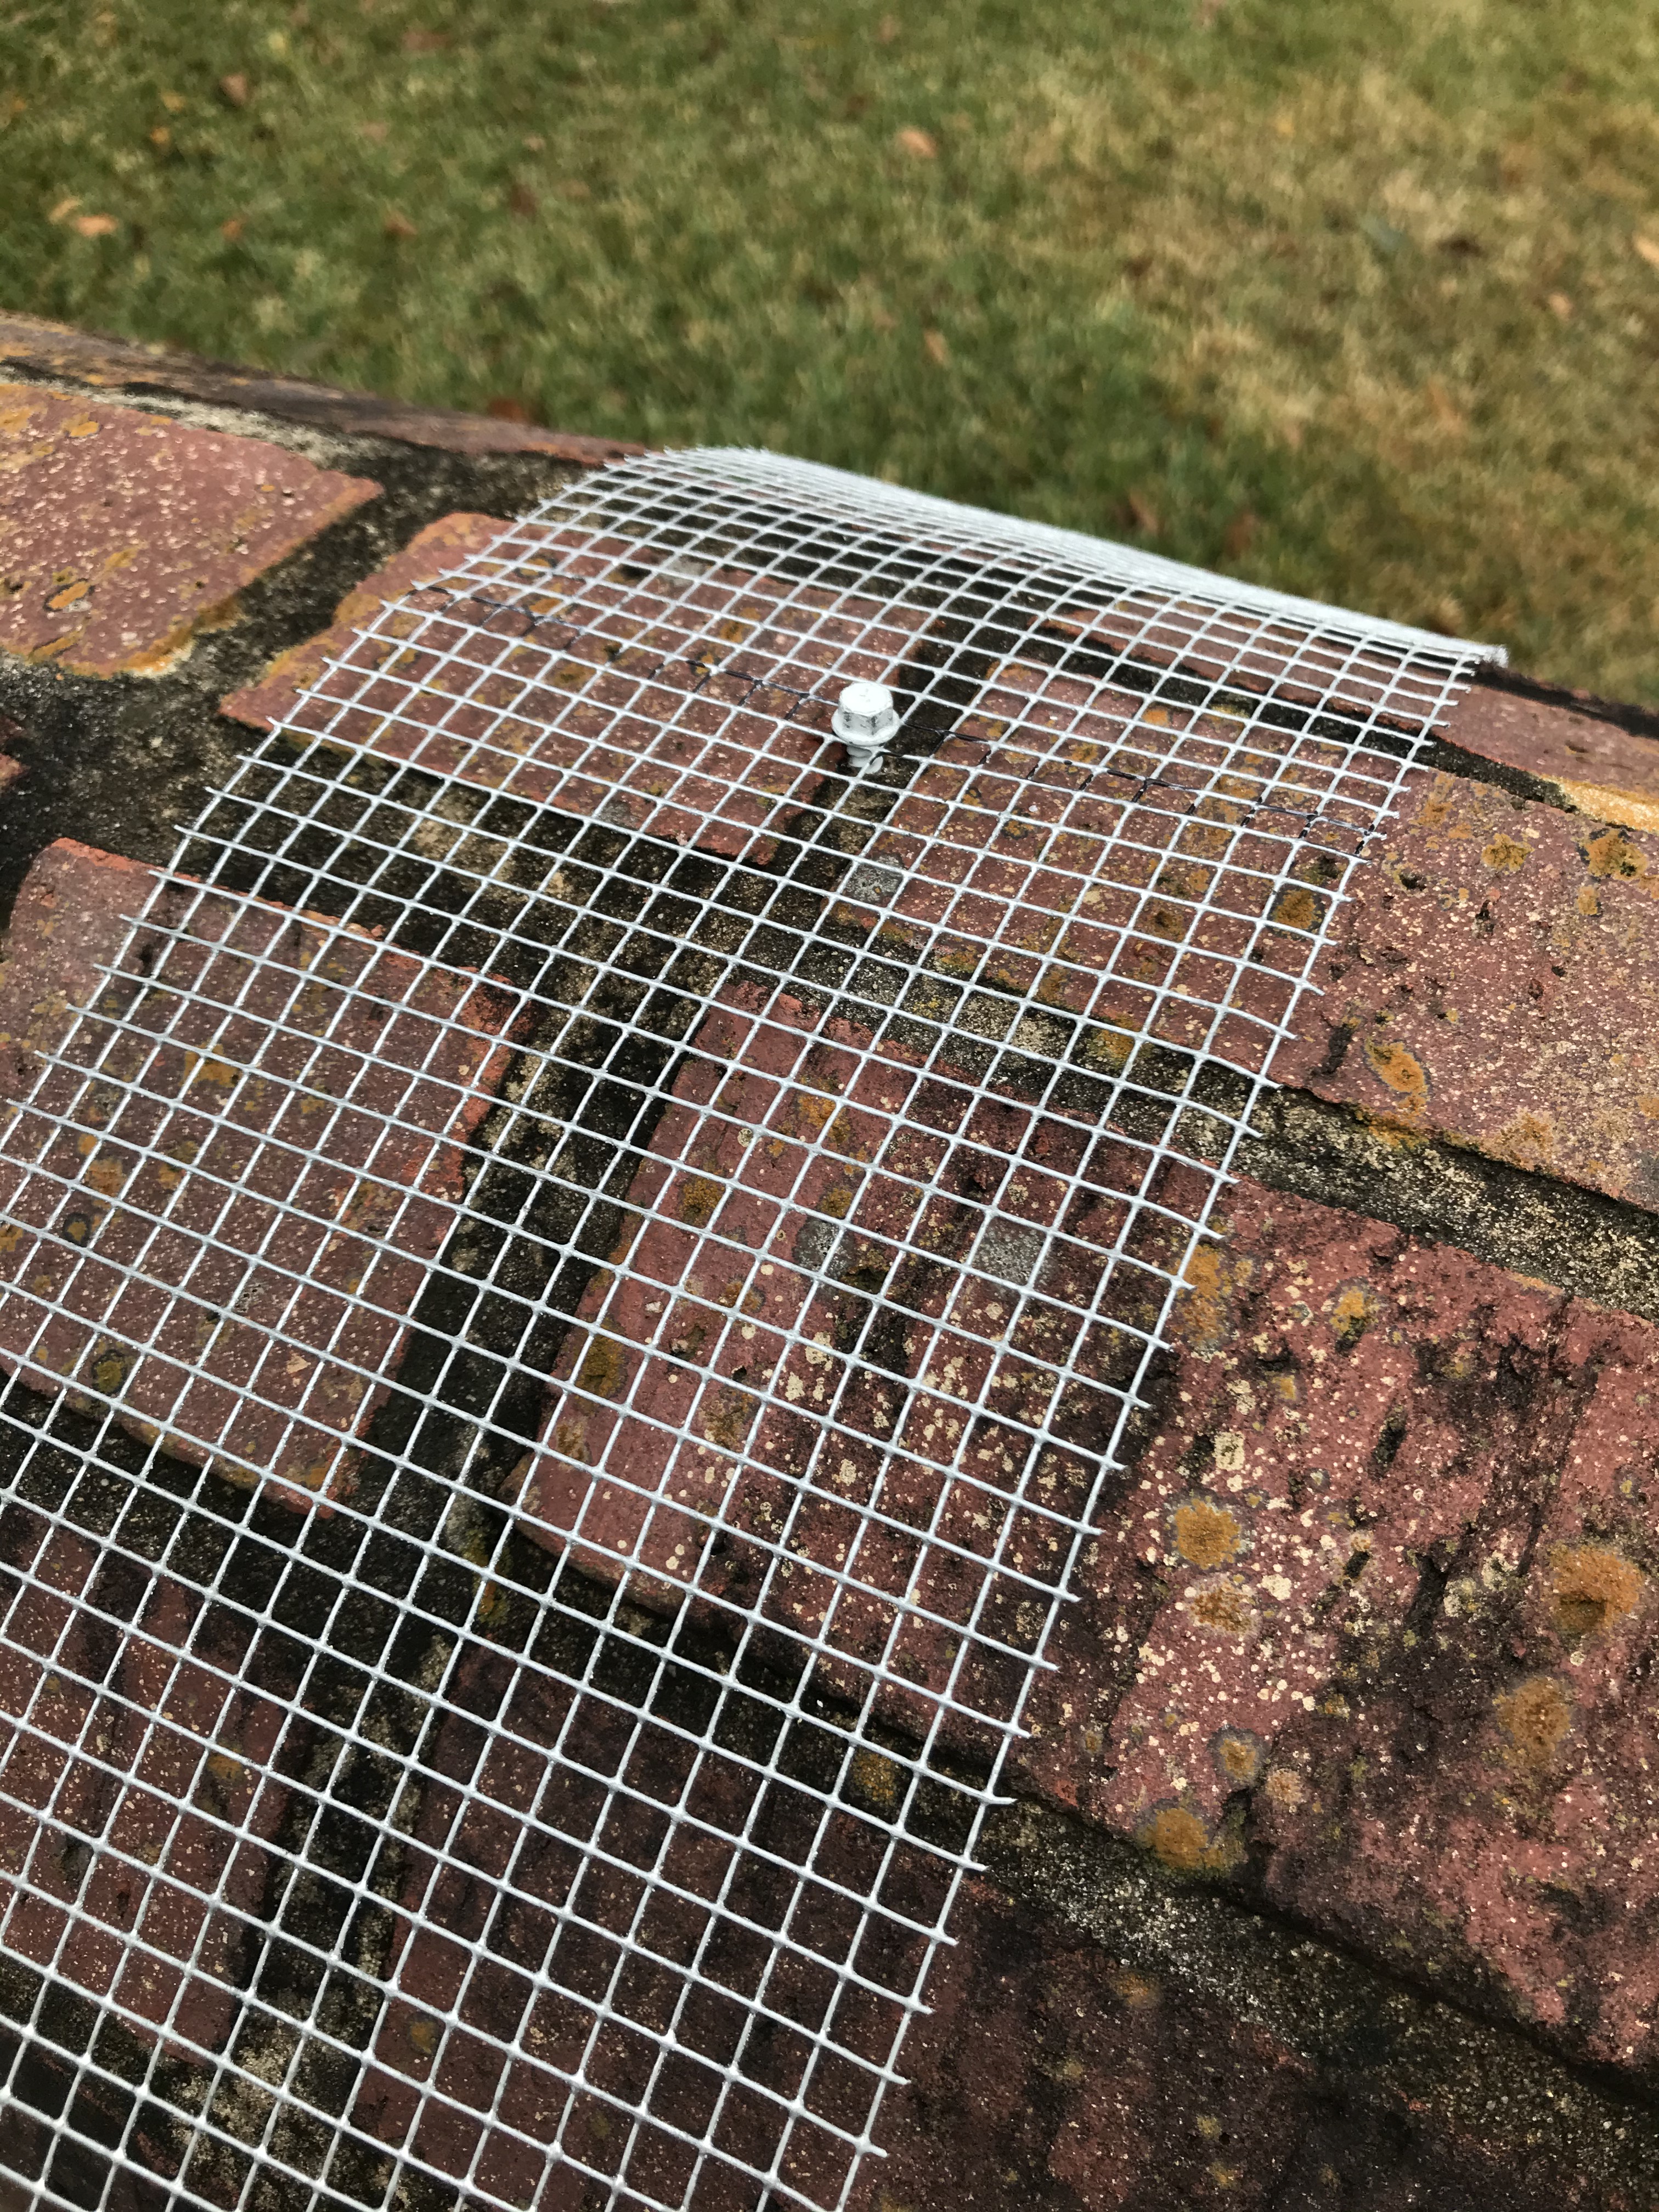
Step 1
If you have a brick mailbox, you can do what I (Matt) did, drill a hole in the grout and you can always fill it back in later. Matt had a roll of wire mesh (hardware cloth fencing) in the garage. He cut a piece for me and marked the middle with a sharpie.
He also gave me access to his vast zip-tie collection.
Step 2
I started by zip-tying the Christmas tree limbs on each side.

I let the mesh shape itself around the mailbox.
Step 3
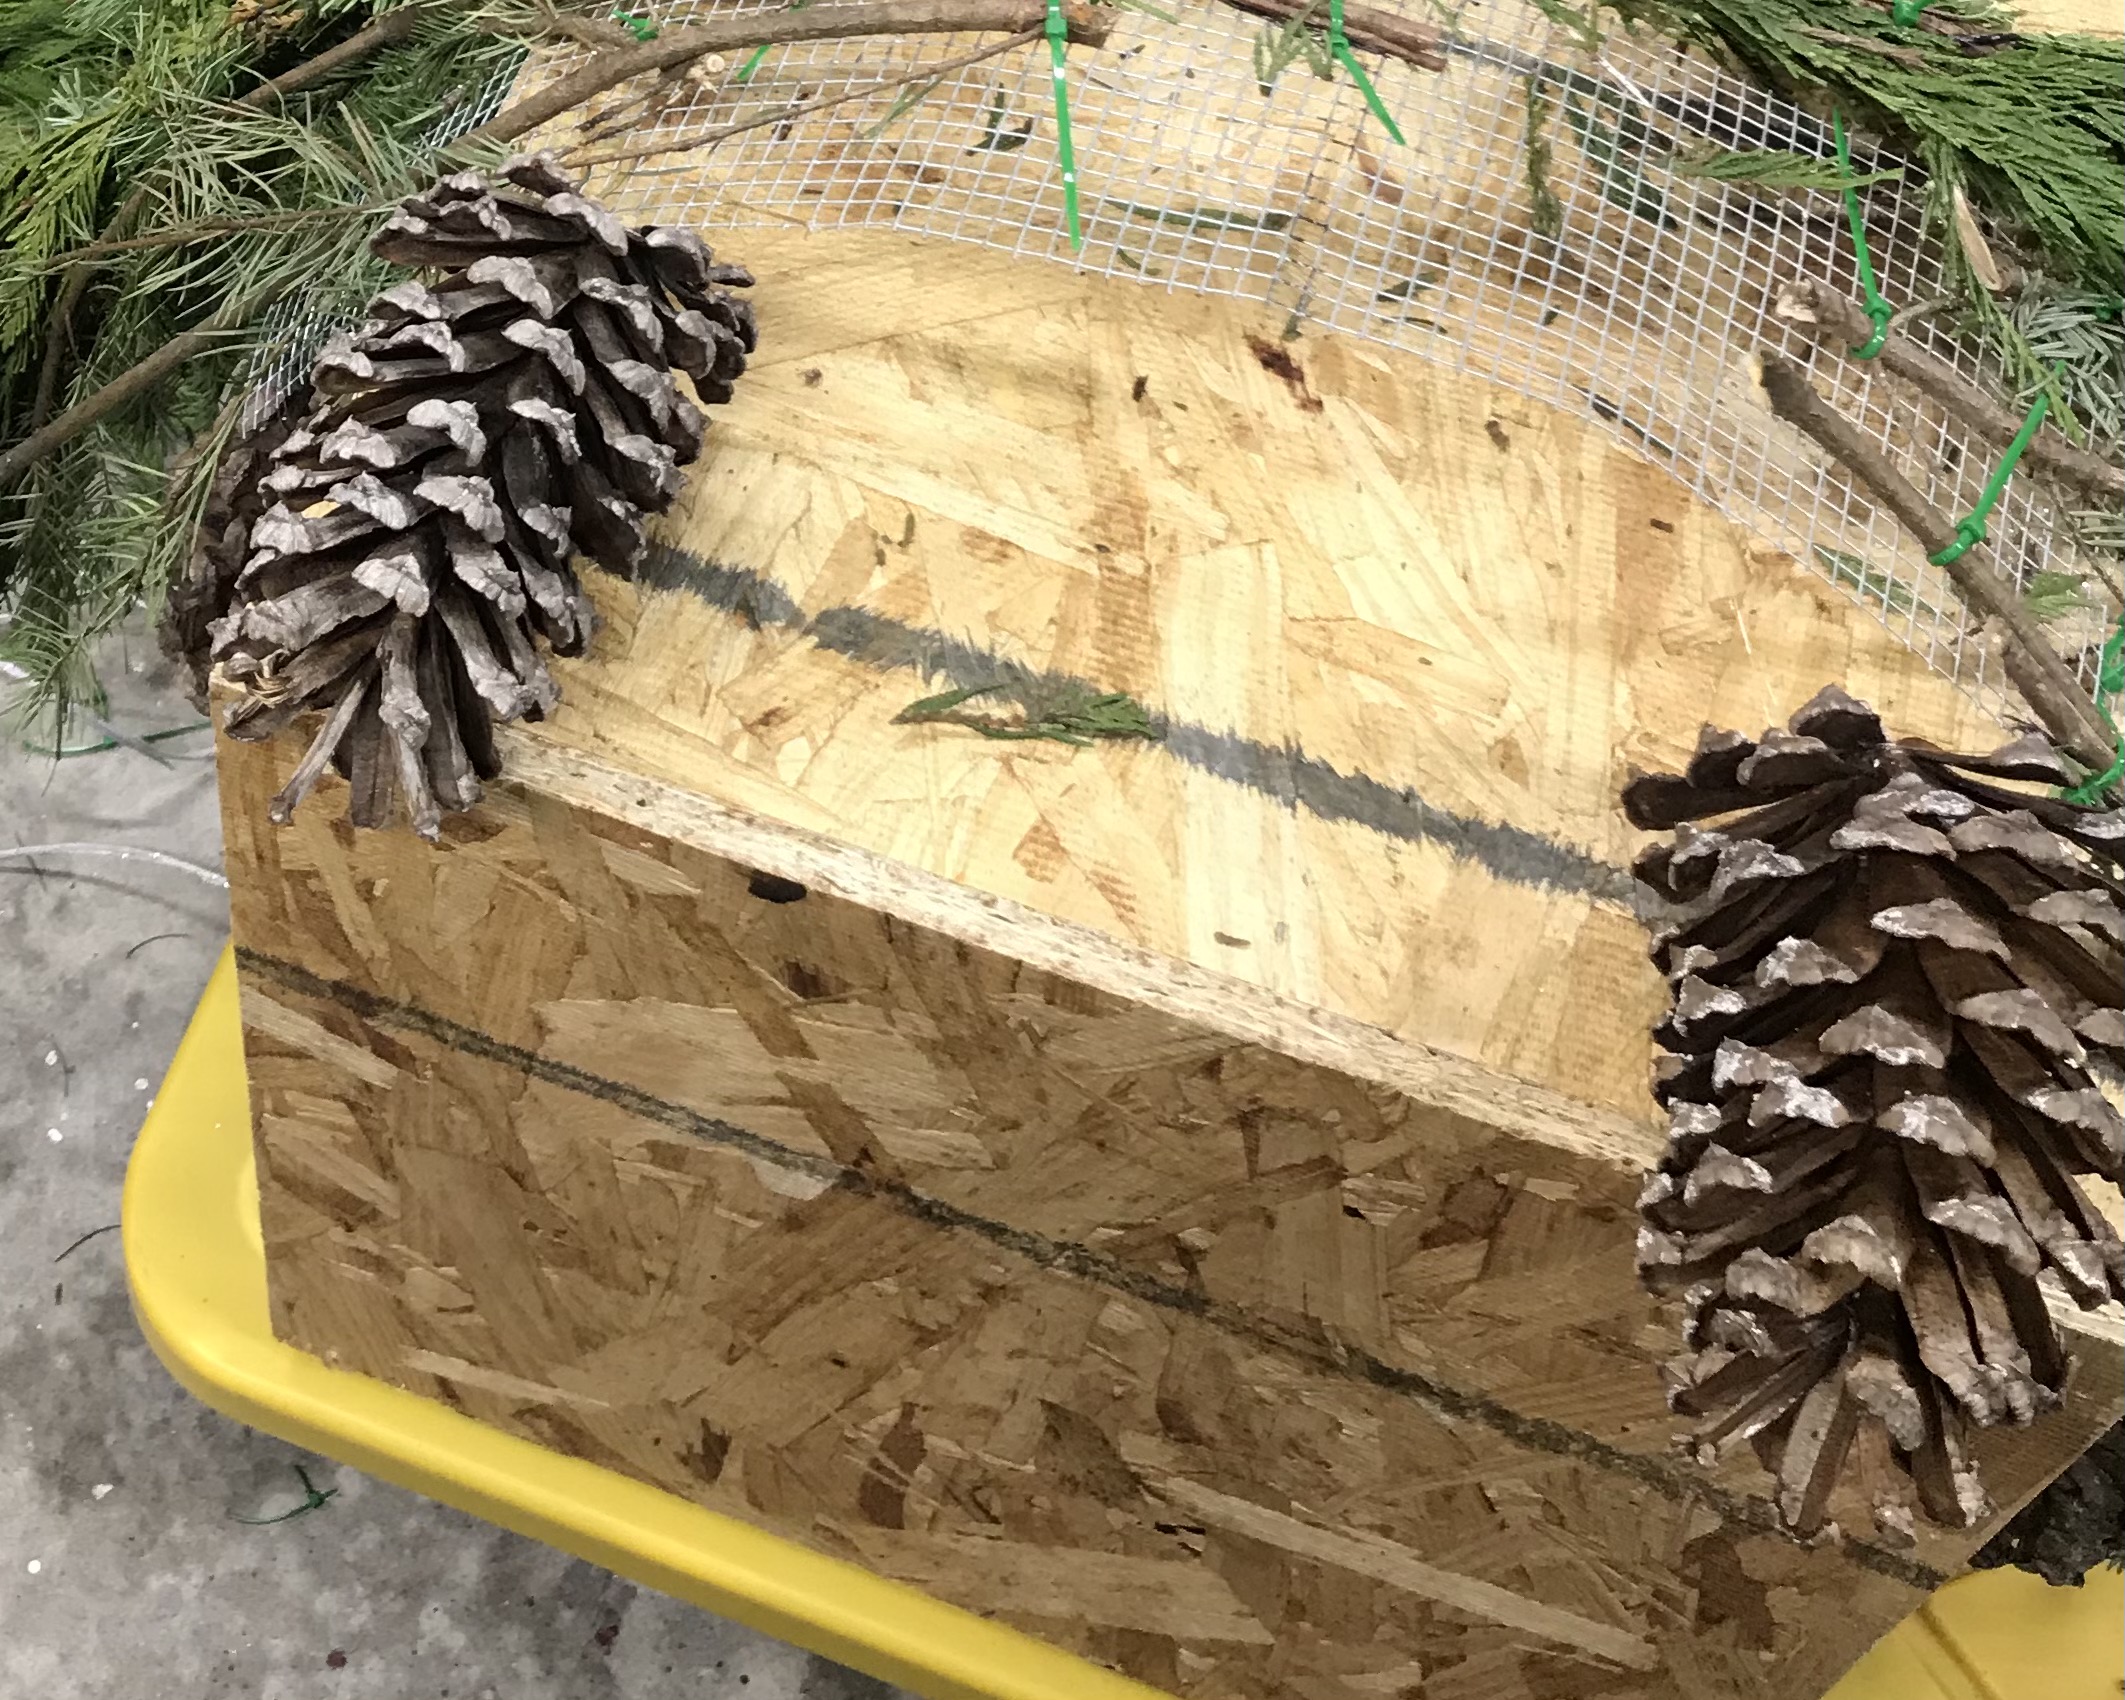
Because I needed to be able to thread the zip ties and fishing line through the mesh, I removed the screw and moved the arrangement to the garage on top of a wooden box.

I had already separated the pieces of garland and cut the magnolia stems off of the limbs. I started layering the cedar pieces over the Christmas tree limbs. I used different size zip-ties by threading them through the mesh.
Step 4
I decided where I wanted my pinecones to go so I wrapped the bottoms with fishing line and the threaded it through the mesh, allowing some give so that the pinecones could sit on top of the magnolia stems.
Step 5
Once I had my base, I started installing the magnolia stems.

I wish I had paid more attention during this step. I should have noticed that the front of the arrangement was showing the brown side of the leaves.
Step 6
I added some red ornaments with skinny zip-ties and then took the arrangement outside to check on how it was looking. I also added some silver glittered ting ting. I made sure to confirm where the arrangement would sit in relation to the screw hole.

Step 7
I brought the arrangement back to the garage. The next step was the bow. This year I purchased the worst outdoor, red velvet ribbon ever made. It does not have wire so making it do anything is impossible. My bows made with this ribbon are horrible but it was slim pickings this year.
I used a zip-tie to secure the bow by threading it through the mesh. However, I did not tighten it completely because I still needed to put the screw back through the mesh.
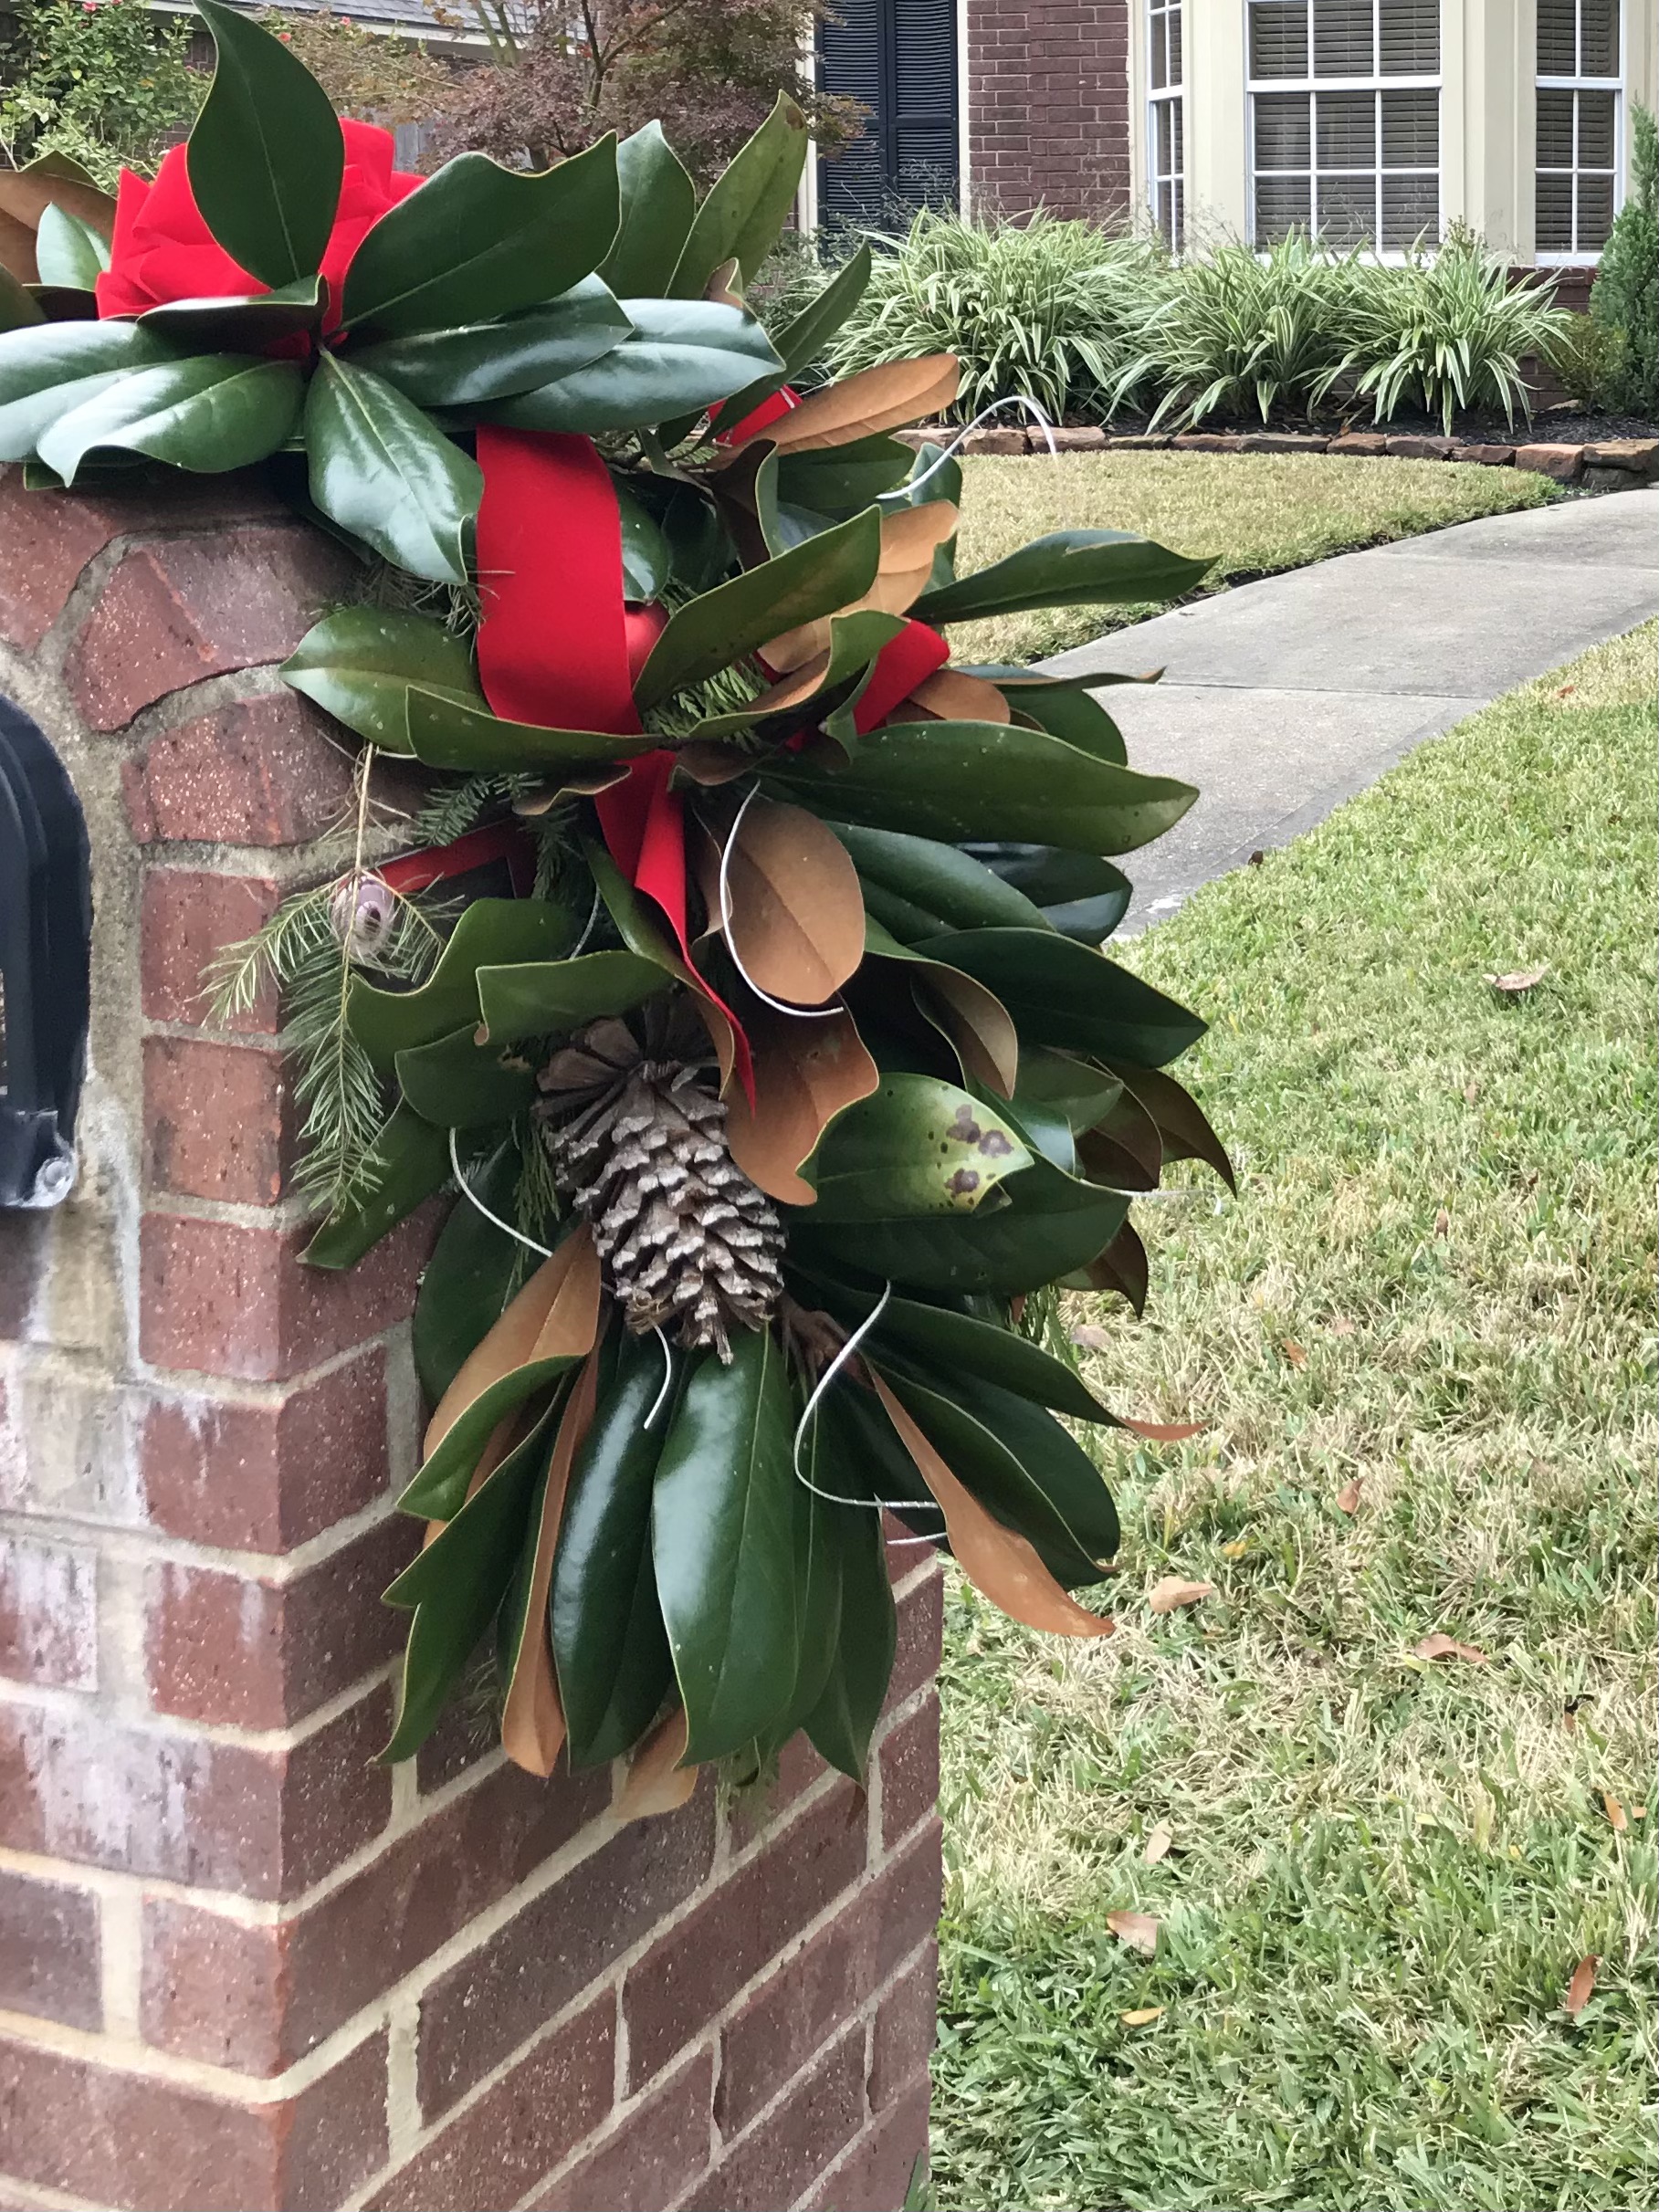
I brought the arrangement back to the mailbox, installed the screw, and tightened the zip-tie securing the bow.


Make a comment